
Welcome to our comprehensive guide on Computer motherboards! Whether you’re a seasoned PC builder, a tech enthusiast exploring hardware essentials, or someone new to understanding the backbone of computer systems, motherboards are a fundamental component. In this blog, we’ll unravel the complexities surrounding motherboards by addressing the top 15 common questions users often encounter.
From the basics of motherboard anatomy and functionality to choosing the right motherboard for your needs, compatibility considerations, troubleshooting tips, and beyond, we’ll cover it all. Explore questions such as understanding chipset differences, PCIe slots, RAM compatibility, BIOS updates, and the impact of motherboard form factors on your build.
Our goal is to empower you with comprehensive insights that demystify motherboards, enabling you to make informed decisions when building, upgrading, or troubleshooting your PC. Whether you’re planning a gaming rig, a workstation for professional tasks, or a compact HTPC (Home Theater PC), this blog will serve as your ultimate resource.
Join us on this journey through the world of motherboards as we explore the top 15 questions and equip you with the knowledge needed to harness the full potential of your computer build. Let’s dive into the intricacies of motherboards together!
Table of Contents
- 1. What is a motherboard and what does it do?
- 2. How do I choose the right motherboard for my computer build?
- 3. What are the different types of motherboards (ATX, Micro-ATX, Mini-ITX)?
- 4. What is the difference between a motherboard’s chipset and its CPU socket?
- 5. How do I install a CPU on a motherboard?
- 6. What is the purpose of the BIOS or UEFI firmware on a motherboard?
- 7. How do I update my motherboard’s BIOS or UEFI firmware?
- 8. What are the different types of expansion slots on a motherboard (PCIe, PCI, AGP)?
- 9. How do I install a graphics card on a motherboard?
- 10. What are the different types of storage connectors on a motherboard (SATA, M.2, PCIe)?
- 11. How do I troubleshoot common motherboard issues (no power, no display, etc.)?
- 12. Can I upgrade my motherboard’s components (RAM, CPU, etc.)?
- 13. How do I choose the right motherboard for gaming or video editing?
- 1. Determine Your CPU Choice
- 2. Choose the Right Form Factor
- 3. Consider RAM Support
- 4. Look at Expansion Slots
- 5. Storage Options
- 6. Connectivity and Ports
- 7. Audio and Video Outputs
- 8. Power Delivery and Cooling
- 9. BIOS/UEFI Features
- 10. Brand and Warranty
- Recommended Motherboards for Gaming and Video Editing
- Summary
- 14. What are the benefits of a high-quality motherboard versus a budget-friendly one?
- 15. How do I properly clean and maintain my motherboard?
1. What is a motherboard and what does it do?
A motherboard is the main circuit board of a computer, serving as the central hub that connects all the components and allows them to communicate with each other. It plays a crucial role in the overall functionality of a computer system. Here’s a breakdown of what a motherboard is and what it does:
What is a Motherboard?
- Definition:
- The motherboard is a large, flat circuit board that houses the CPU (central processing unit), RAM (random access memory), and various other components and connectors. It provides the electrical pathways that allow these components to interact.
- Components:
- CPU Socket: The slot where the CPU is installed.
- RAM Slots: Slots for installing memory modules (RAM).
- Chipset: Manages communication between the CPU, memory, and other peripherals.
- Expansion Slots: PCIe and other slots for adding expansion cards (e.g., graphics cards, sound cards).
- Storage Connectors: SATA and M.2 slots for connecting storage devices (HDDs, SSDs).
- I/O Ports: Connectors for external peripherals (USB ports, Ethernet, audio jacks).
- Power Connectors: Connectors for supplying power to the motherboard and its components.
- BIOS/UEFI Firmware: Firmware that initializes hardware and provides an interface for configuring system settings.
What Does a Motherboard Do?
- Central Hub for Communication:
- The motherboard acts as the central communication hub for the entire computer system. It connects and allows data to be exchanged between the CPU, RAM, storage devices, expansion cards, and peripheral devices.
- Power Distribution:
- It distributes power from the power supply to various components, including the CPU, memory, storage devices, and expansion cards. It ensures that each component receives the correct voltage and current.
- System Initialization:
- During the boot process, the motherboard’s BIOS/UEFI firmware performs a Power-On Self-Test (POST) to check the functionality of essential hardware components. It then loads the bootloader from the storage device to start the operating system.
- Hardware Configuration:
- The motherboard provides an interface for configuring hardware settings. Users can adjust settings such as CPU clock speeds, memory timings, and boot order through the BIOS/UEFI interface.
- Data Flow Management:
- The motherboard’s chipset manages the data flow between the CPU, memory, and peripherals. It ensures efficient data transfer and system performance by handling tasks such as memory access, input/output operations, and device communication.
- Expansion and Upgradability:
- It provides expansion slots for adding additional hardware components like graphics cards, network cards, and storage controllers. This allows users to upgrade and expand their system’s capabilities.
- Peripheral Connectivity:
- The motherboard includes various I/O ports for connecting external devices such as keyboards, mice, printers, and USB drives. It also supports internal connections for devices like fans and internal storage.
- System Monitoring and Control:
- It monitors system health parameters such as temperature, fan speeds, and voltages. It can also control system cooling by adjusting fan speeds and providing warnings if temperatures exceed safe limits.
Summary
The motherboard is the backbone of a computer system, providing the necessary connections and pathways for all the components to interact and work together. It ensures that the system functions properly by managing communication, power distribution, and hardware configuration. In essence, the motherboard integrates and coordinates all the hardware elements of a computer, enabling it to operate as a cohesive unit.
2. How do I choose the right motherboard for my computer build?
Choosing the right motherboard for your computer build is a crucial step, as it ties together all your components, from the CPU to storage devices, and can affect performance, upgradeability, and system stability. Here’s a detailed breakdown to guide you through the process:
1. Compatibility with Your CPU
The most important factor in choosing a motherboard is compatibility with your CPU. The motherboard needs to support the CPU’s socket type and chipset. Different processors (Intel vs. AMD) require different socket types.
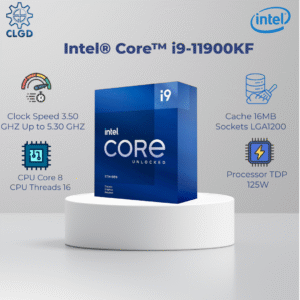
- Intel: Look for a motherboard with the appropriate socket for your Intel CPU (e.g., LGA 1200 for 10th/11th gen or LGA 1700 for 12th gen and beyond).
- AMD: AMD uses the AM4 socket for most recent processors (e.g., Ryzen 3000/5000 series) or newer AM5 for Ryzen 7000 series CPUs.
The chipset on the motherboard will also determine specific features like PCIe support, RAM speeds, and CPU overclocking capabilities. For example:
- Intel Chipsets: Z-series (e.g., Z590, Z690) support overclocking, while B-series (e.g., B460, B660) typically do not.
- AMD Chipsets: B-series (B550) or X-series (X570) motherboards for Ryzen processors are often better for overclocking and high-end features.
2. Motherboard Form Factor
Motherboards come in different sizes, called form factors, which impact the number of components you can install and the size of the case you’ll need.
- ATX: Standard size, offers plenty of expansion slots and ports.
- Micro-ATX: Smaller than ATX, usually with fewer expansion slots but still great for most builds.
- Mini-ITX: The smallest, perfect for compact builds but limited in terms of expandability.
3. RAM Support
Check the motherboard’s supported RAM type (e.g., DDR4 or DDR5), capacity (how much RAM it can handle), and speed. Make sure the motherboard supports the kind of RAM that fits your CPU and usage.
- DDR4 vs. DDR5: DDR5 is faster, but DDR4 is still widely used and often more affordable.
- Capacity: Most motherboards support 64GB or more, but check if you need that much based on your use case (gaming, content creation, etc.).
- Dual or Quad Channel: Motherboards typically support dual-channel RAM for better performance, though some higher-end boards support quad-channel setups.
4. Expansion Slots and Ports
The motherboard determines what additional components you can install, including graphics cards, storage devices, and PCIe devices.
- PCIe slots: These are used for your GPU and other expansion cards (e.g., sound cards, network cards). If you plan to use multiple GPUs or other expansion cards, ensure the motherboard has enough PCIe slots.
- PCIe 4.0 vs. PCIe 3.0: PCIe 4.0 offers higher bandwidth and is important for faster GPUs and SSDs. However, PCIe 3.0 is often still adequate for most users.
- M.2 slots: These are for SSDs, especially NVMe SSDs, which provide faster storage than SATA SSDs. A good motherboard should have at least one M.2 slot, ideally supporting PCIe 4.0 if you’re building a high-end system.
5. Power Delivery and Cooling
A motherboard’s power delivery system is important for stable performance, especially if you’re using a high-end CPU or plan to overclock.
- VRMs (Voltage Regulator Modules): The quality and number of VRMs on the motherboard influence how well the CPU receives power. A stronger VRM design is especially important for overclocking or running high-performance processors.
- Cooling options: High-end motherboards offer better cooling solutions, such as heatsinks for the VRMs and M.2 slots. If you plan to overclock, good cooling is essential for stable performance.
6. I/O and Connectivity
Consider the type and number of ports and connections you’ll need.
- USB Ports: Look at both the number and type of USB ports (USB 3.2 Gen 1, Gen 2, USB-C). If you need faster data transfer or plan to connect multiple peripherals, more USB ports and newer standards are better.
- Ethernet and Wi-Fi: If you need high-speed internet, check if the motherboard has a 2.5Gb or 10Gb Ethernet port. If you’re building a system without a wired connection, you might want Wi-Fi support.
- Audio & Video Outputs: If you plan to use onboard graphics, ensure the motherboard has HDMI, DisplayPort, or other video outputs. For audio, check the quality of the integrated sound chip (e.g., Realtek, Creative).
7. Storage Options
The motherboard will define how many storage devices you can attach and what type of connections are available.
- SATA ports: For traditional hard drives and SATA SSDs. Most modern motherboards will have at least 4-6 SATA ports.
- M.2 Slots: These are used for NVMe SSDs, which provide faster read/write speeds compared to SATA SSDs. Ensure your motherboard has enough M.2 slots, especially if you plan to install multiple drives.
8. Onboard Features
Consider additional features you might need, such as:
- Onboard Wi-Fi: If you don’t want to use a dedicated Wi-Fi card, choose a motherboard with built-in Wi-Fi 5 (Wi-Fi AC) or Wi-Fi 6 support.
- Bluetooth: Some motherboards include Bluetooth for wireless peripherals.
- RGB: If you’re into aesthetics, many motherboards feature RGB lighting or support for RGB accessories.
9. Budget and Brand Reliability
Your budget will help narrow down choices. High-end motherboards offer the best features and build quality but can be significantly more expensive. Established brands like ASUS, MSI, Gigabyte, and ASRock have a good reputation for reliability and quality, but reviews and user feedback can give you more specific insights into their reliability.
10. Future-Proofing
When possible, choose a motherboard that offers future upgrade paths. This means ensuring it supports the latest technologies (like PCIe 4.0 or 5.0), supports higher RAM speeds, and is capable of handling newer CPUs when you decide to upgrade.
Quick Recap:
- Check CPU compatibility (socket and chipset).
- Choose form factor based on case size and expandability needs.
- Match RAM type and capacity to your needs (DDR4 vs. DDR5).
- Ensure enough expansion slots (PCIe, M.2, SATA) for future upgrades.
- Consider I/O ports and connectivity based on your peripheral needs.
- Look for a solid power delivery system and cooling for stability, especially for overclocking.
- Research brands and reviews for reliability.
Would you like specific motherboard recommendations based on a particular build or budget range? I can help you with that too!
3. What are the different types of motherboards (ATX, Micro-ATX, Mini-ITX)?
- E-ATX (Extended ATX)
- Dimensions: Typically 305mm x 330mm (12″ x 13″)
- Expansion Slots: 7-8 PCIe slots
- RAM Slots: 6-8
- Use Case: High-end gaming, workstations, and servers requiring extensive expansion and features.
- ATX (Advanced Technology eXtended)
- Dimensions: Typically 305mm x 244mm (12″ x 9.6″)
- Expansion Slots: 7 PCIe slots
- RAM Slots: 4-8
- Use Case: High-end desktops, gaming PCs, and workstations.
- Micro-ATX (mATX)
- Dimensions: Typically 244mm x 244mm (9.6″ x 9.6″)
- Expansion Slots: 4 PCIe slots
- RAM Slots: 2-4
- Use Case: Mid-range desktops, offering a balance between size, expandability, and cost.
- Mini-ATX
- Dimensions: Typically 284mm x 208mm (11.2″ x 8.2″)
- Expansion Slots: Similar to Micro-ATX
- RAM Slots: Similar to Micro-ATX
- Use Case: Less common, used in some specific desktop configurations.
- Mini-ITX
- Dimensions: Typically 170mm x 170mm (6.7″ x 6.7″)
- Expansion Slots: 1 PCIe slot
- RAM Slots: 2
- Use Case: Small form factor (SFF) builds, home theater PCs (HTPCs), and compact gaming rigs.
- Nano-ITX
- Dimensions: Typically 120mm x 120mm (4.7″ x 4.7″)
- Expansion Slots: None or limited
- RAM Slots: Often soldered or limited to 1 slot
- Use Case: Embedded systems, IoT devices, and ultra-compact computers.
- Pico-ITX
- Dimensions: Typically 100mm x 72mm (3.9″ x 2.8″)
- Expansion Slots: None or limited
- RAM Slots: Often soldered or limited to 1 slot
- Use Case: Embedded systems, IoT devices, and very small form factor computers.
- Mobile-ITX
- Dimensions: Typically 60mm x 60mm (2.4″ x 2.4″)
- Expansion Slots: None
- RAM Slots: Often soldered
- Use Case: Very compact, mobile, and embedded systems, medical devices, and industrial applications.
Summary of Motherboard Sizes
| Form Factor | Dimensions (mm) | Dimensions (inches) | Expansion Slots | RAM Slots | Typical Use Case |
| E-ATX | 305 x 330 | 12 x 13 | 7-8 | 6-8 | High-end gaming, workstations, servers |
| ATX | 305 x 244 | 12 x 9.6 | 7 | 4-8 | High-end desktops, gaming PCs, workstations |
| Micro-ATX | 244 x 244 | 9.6 x 9.6 | 4 | 2-4 | Mid-range desktops |
| Mini-ATX | 284 x 208 | 11.2 x 8.2 | Similar to mATX | Similar to mATX | Specific desktop configurations |
| Mini-ITX | 170 x 170 | 6.7 x 6.7 | 1 | 2 | SFF builds, HTPCs, compact gaming rigs |
| Nano-ITX | 120 x 120 | 4.7 x 4.7 | None or limited | Often soldered or 1 | Embedded systems, IoT devices |
| Pico-ITX | 100 x 72 | 3.9 x 2.8 | None or limited | Often soldered or 1 | Embedded systems, IoT devices |
| Mobile-ITX | 60 x 60 | 2.4 x 2.4 | None | Often soldered | Compact mobile and embedded systems |
When selecting a motherboard, consider the size of the case you plan to use, the expandability you require, and the specific use case for your system.
4. What is the difference between a motherboard’s chipset and its CPU socket?
The chipset and CPU socket are two fundamental components of a motherboard, each serving different roles in the computer system’s operation:
CPU Socket
- Purpose:
- The CPU socket is the physical interface on the motherboard that houses and connects the central processing unit (CPU) to the motherboard.
- It ensures a secure and compatible connection between the CPU and the motherboard, allowing communication between the CPU and other system components.
- Compatibility:
- The CPU socket determines which CPUs can be installed on the motherboard. Different CPU models and generations use different socket types.
- For example, Intel’s LGA 1200 socket supports certain generations of Intel Core processors, while AMD’s AM4 socket supports various AMD Ryzen processors.
- Physical Design:
- The socket consists of a series of pins or contacts that align with corresponding pads or pins on the CPU. The design ensures that the CPU fits correctly and maintains a stable connection.
- Upgradability:
- Upgrading the CPU often requires a compatible motherboard with the same socket type. An incompatible socket means you would need a new motherboard for the new CPU.
Chipset
- Purpose:
- The chipset is a set of electronic components on the motherboard that manages data flow between the CPU, memory, storage devices, and peripheral devices.
- It acts as a communication hub for the system, ensuring data is transmitted efficiently between different parts of the computer.
- Components:
- Traditionally, the chipset was divided into the Northbridge and Southbridge. Modern chipsets often integrate these functions into a single chipset, especially with advancements in CPU architecture.
- Northbridge: Handled communication between the CPU, RAM, and graphics card.
- Southbridge: Managed I/O functions, such as USB ports, audio, storage, and network connections.
- Traditionally, the chipset was divided into the Northbridge and Southbridge. Modern chipsets often integrate these functions into a single chipset, especially with advancements in CPU architecture.
- Features and Capabilities:
- The chipset determines many of the motherboard’s features, such as the number and type of USB ports, PCIe slots, SATA ports, and support for integrated graphics.
- It also influences the motherboard’s support for overclocking, RAID configurations, and power management features.
- Compatibility and Performance:
- The chipset must be compatible with the CPU and the socket type. Different chipsets offer varying levels of performance, features, and connectivity options.
- For example, Intel’s Z-series chipsets (e.g., Z590) typically offer more advanced features and overclocking support compared to their H-series or B-series counterparts.
Key Differences
- Function:
- The CPU socket provides the physical and electrical connection between the CPU and the motherboard.
- The chipset manages communication and data flow between the CPU and other components, determining the overall functionality and connectivity of the motherboard.
- Compatibility:
- The CPU socket determines which CPUs can be physically installed on the motherboard.
- The chipset determines the motherboard’s capabilities and features, influencing the performance and compatibility with various peripherals and components.
- Upgrade Considerations:
- When upgrading a CPU, the socket type is crucial. An incompatible socket requires a new motherboard.
- When considering overall system features and performance, the chipset is a critical factor, as it dictates the range of supported features and connectivity options.
In summary, the CPU socket and chipset are integral to the motherboard’s operation, with the socket focusing on connecting the CPU and the chipset managing overall system communication and functionality.
5. How do I install a CPU on a motherboard?
Installing a CPU on a motherboard is a delicate process that requires careful handling to avoid damaging the CPU or the motherboard. Here’s a step-by-step guide to help you install a CPU correctly:
1. Prepare Your Workspace
- Static-Free Environment: Work on a clean, static-free surface. Use an anti-static wrist strap to prevent static discharge from damaging your components.
- Gather Tools: You will need the CPU, motherboard, and thermal paste (if the CPU cooler does not have pre-applied paste).
2. Install the CPU
For Intel CPUs (LGA Socket)
- Open the CPU Socket:
- Release the lever on the CPU socket to open the retention bracket.
- Lift the bracket to expose the socket.
- Align the CPU:
- Carefully remove the CPU from its packaging, holding it by the edges.
- Align the notches or triangles on the CPU with the notches or triangles on the socket.
- Place the CPU in the Socket:
- Gently place the CPU into the socket without forcing it. It should fit snugly if properly aligned.
- Lower the retention bracket and secure it by pressing down the lever.
For AMD CPUs (AM4 Socket)
- Open the CPU Socket:
- Lift the lever on the CPU socket to a 90-degree angle to open the socket.
- Align the CPU:
- Carefully remove the CPU from its packaging, holding it by the edges.
- Align the triangle on the corner of the CPU with the triangle on the socket.
- Place the CPU in the Socket:
- Gently place the CPU into the socket without forcing it. It should drop into place if aligned correctly.
- Lower the lever to secure the CPU in the socket.
3. Apply Thermal Paste (if necessary)
- Pre-Applied Thermal Paste: If your CPU cooler has pre-applied thermal paste, skip this step.
- Manual Application: If not, apply a small pea-sized amount of thermal paste to the center of the CPU. When the cooler is installed, the paste will spread evenly.
4. Install the CPU Cooler
- Position the Cooler:
- Align the cooler over the CPU and mounting holes.
- For stock coolers, the process is usually straightforward with clip or screw mechanisms.
- Secure the Cooler:
- Attach the cooler according to the manufacturer’s instructions, ensuring it is firmly in place.
- For screw-in coolers, tighten the screws in a diagonal pattern to apply even pressure.
- Connect the Cooler’s Fan:
- Plug the cooler’s fan connector into the CPU fan header on the motherboard, usually labeled “CPU_FAN”.
5. Final Checks
- Recheck Installation: Ensure the CPU and cooler are properly seated and secure.
- Connect All Necessary Cables: Make sure the CPU fan is connected to the correct header.
- Inspect for Issues: Check for any loose components or screws that may have fallen into the case.
Summary
- Prepare Your Workspace:
- Use an anti-static wrist strap.
- Gather tools and components.
- Install the CPU:
- For Intel: Open the socket, align the CPU, and secure it.
- For AMD: Open the socket, align the CPU, and secure it.
- Apply Thermal Paste (if needed):
- Apply a pea-sized amount if the cooler doesn’t have pre-applied paste.
- Install the CPU Cooler:
- Position and secure the cooler.
- Connect the cooler’s fan to the CPU fan header.
- Final Checks:
- Ensure everything is secure and properly connected.
- Inspect for any issues.
By following these steps carefully, you can successfully install a CPU on a motherboard and ensure your system runs smoothly.
6. What is the purpose of the BIOS or UEFI firmware on a motherboard?
The BIOS (Basic Input/output System) or UEFI (Unified Extensible Firmware Interface) firmware on a motherboard serves several critical purposes in the operation of a computer:
- Hardware Initialization and Boot Process
- Initialization: The BIOS/UEFI initializes and tests the system hardware components during the boot process. This includes checking the CPU, RAM, storage devices, and other peripherals to ensure they are functioning correctly.
- Boot Loader: After initialization, the BIOS/UEFI locates and loads the bootloader or operating system from the storage device to start the computer.
- System Configuration
- Settings Interface: The BIOS/UEFI provides a firmware interface that allows users to configure system settings such as boot order, CPU clock speeds, memory timings, and power management options.
- Hardware Settings: Users can enable or disable specific hardware components, set up RAID configurations, and adjust fan speeds and other hardware-related settings.
- Power-On Self-Test (POST)
- Diagnostics: During the POST process, the BIOS/UEFI performs a series of diagnostic tests to ensure all essential hardware components are functioning correctly before the operating system loads.
- Error Reporting: If there are any issues, such as hardware failures or configuration problems, the BIOS/UEFI will display error messages or beep codes to help diagnose the problem.
- Firmware Updates
- Updates: The BIOS/UEFI can be updated to add new features, improve compatibility with newer hardware, and fix bugs or security vulnerabilities. This process is known as “flashing” the BIOS/UEFI.
- Security Features
- Secure Boot: UEFI, in particular, supports Secure Boot, a security feature that ensures only trusted and signed software can boot on the system, helping to prevent malware and unauthorized operating systems from loading.
- Password Protection: The BIOS/UEFI allows users to set passwords to prevent unauthorized access to the firmware settings and to secure the system at boot.
- System Management
- Monitoring: The BIOS/UEFI can monitor system health parameters such as CPU temperature, fan speeds, and voltages, providing information to help maintain system stability and prevent overheating.
- Power Management: Advanced power management features, including power-saving modes and wake-on-LAN, can be configured within the BIOS/UEFI.
Differences between BIOS and UEFI
- Interface: UEFI provides a more user-friendly interface with graphical menus and mouse support, while BIOS typically has a text-based interface.
- Storage Support: UEFI supports larger storage devices and drives using the GPT (GUID Partition Table) partitioning scheme, whereas BIOS is limited to MBR (Master Boot Record) with a maximum of 2TB per drive.
- Boot Speed: UEFI can offer faster boot times and more efficient initialization of hardware compared to BIOS.
- Extensibility: UEFI is more flexible and can be extended with additional modules and drivers, allowing for greater customization and functionality.
In summary, the BIOS/UEFI firmware is essential for the initial boot process, system configuration, hardware diagnostics, and security management of a computer system. It serves as the intermediary between the hardware and the operating system, ensuring that the system runs smoothly and efficiently.
7. How do I update my motherboard’s BIOS or UEFI firmware?
Updating your motherboard’s BIOS or UEFI firmware can improve system stability, compatibility, and performance. However, it’s a delicate process that, if done incorrectly, can render your motherboard unusable. Here’s a step-by-step guide to help you safely update your BIOS or UEFI firmware:
1. Check the Current BIOS/UEFI Version
- Enter BIOS/UEFI: Restart your computer and press the key (often Del, F2, or Esc) to enter the BIOS/UEFI setup.
- Find Version Information: Look for the BIOS version, which is usually displayed on the main screen or under a System Information tab.
2. Determine If an Update Is Necessary
- Visit the Manufacturer’s Website: Go to your motherboard manufacturer’s website and navigate to the support or downloads section for your specific motherboard model.
- Compare Versions: Compare the latest BIOS/UEFI version available on the website with the version currently installed on your system.
- Check Release Notes: Review the release notes for the BIOS updates to see what changes or improvements they offer.
3. Prepare for the Update
- Download the Update: Download the latest BIOS/UEFI update file from the manufacturer’s website. The file is usually compressed in a ZIP format.
- Extract the Files: Extract the contents of the ZIP file to a USB flash drive formatted with FAT32.
- Backup Important Data: Although updating the BIOS doesn’t typically affect data on your drives, it’s always wise to back up important files.
4. Update the BIOS/UEFI
There are different methods to update the BIOS/UEFI, depending on the motherboard manufacturer and model. Here are the common methods:
Method 1: Using BIOS/UEFI Utility (EZ Flash, Q-Flash, M-Flash, etc.)
- Enter BIOS/UEFI Setup:
- Restart your computer and enter the BIOS/UEFI setup.
- Navigate to the Update Utility:
- Look for the BIOS update utility in the BIOS/UEFI menu (e.g., EZ Flash for ASUS, Q-Flash for Gigabyte, M-Flash for MSI).
- Select the Update File:
- Choose the update file you extracted to the USB flash drive.
- Start the Update:
- Follow the on-screen instructions to start the update process. Do not power off your computer during the update.
- Restart Your Computer:
- After the update is complete, the system will restart. Enter the BIOS/UEFI setup again to verify the new version is installed.
Method 2: Using Windows-Based Update Utility
Some motherboard manufacturers provide a Windows-based utility to update the BIOS/UEFI.
- Install the Utility:
- Download and install the manufacturer’s BIOS update utility from their website.
- Run the Utility:
- Open the utility and follow the on-screen instructions to select and update the BIOS file.
- Restart Your Computer:
- The utility will prompt you to restart your computer to complete the update.
Method 3: Using DOS-Based Update Utility
This method involves creating a bootable USB drive with DOS and running the update utility from DOS.
- Create a Bootable USB Drive:
- Use a tool like Rufus to create a bootable USB drive with DOS.
- Copy Update Files:
- Copy the BIOS update files to the USB drive.
- Boot from USB Drive:
- Restart your computer and boot from the USB drive.
- Run the Update Utility:
- Follow the instructions to run the update utility and update the BIOS.
5. Post-Update Steps
- Reset BIOS Settings: After updating, it’s a good practice to reset BIOS settings to default. You can do this within the BIOS/UEFI setup.
- Reconfigure Settings: Reconfigure any custom settings you had previously configured.
- Verify Update: Confirm the BIOS/UEFI version to ensure the update was successful.
Summary
- Check Current Version: Identify the current BIOS/UEFI version.
- Determine Necessity: Compare with the latest version and read release notes.
- Prepare for Update: Download the update, extract files, and back up data.
- Update Using Preferred Method:
- BIOS/UEFI Utility: Use the built-in BIOS update utility.
- Windows Utility: Use the manufacturer’s Windows-based tool.
- DOS Utility: Use a DOS-based utility for older systems.
- Post-Update: Reset and reconfigure BIOS settings, and verify the update.
By following these steps carefully, you can safely update your motherboard’s BIOS or UEFI firmware.
4o
8. What are the different types of expansion slots on a motherboard (PCIe, PCI, AGP)?
Expansion slots on a motherboard allow users to add various peripheral devices to enhance the computer’s capabilities. Here are the different types of expansion slots commonly found on motherboards:
PCIe (Peripheral Component Interconnect Express)
- Purpose:
- PCIe slots are used for a wide range of high-speed internal components such as graphics cards, SSDs, network cards, and sound cards.
- Versions:
- PCIe has several versions, each offering increased bandwidth: PCIe 1.0, 2.0, 3.0, 4.0, 5.0, and the upcoming PCIe 6.0.
- Lanes:
- PCIe slots come in different lane configurations, denoted as x1, x4, x8, x16, where the number represents the number of data lanes.
- More lanes offer higher data transfer rates. For example, x16 is typically used for graphics cards.
- Backward Compatibility:
- PCIe slots and devices are generally backward and forward compatible, meaning you can install a PCIe 3.0 card in a PCIe 4.0 slot, though it will operate at PCIe 3.0 speeds.
PCI (Peripheral Component Interconnect)
- Purpose:
- Older standard used for connecting peripheral devices such as network cards, sound cards, modems, and older GPUs.
- Versions:
- PCI slots come in different versions, with the most common being PCI 2.0 and PCI-X (an extended version for servers).
- Compatibility:
- PCI slots are not compatible with PCIe devices. PCI devices are limited to older motherboards as the standard is largely obsolete.
AGP (Accelerated Graphics Port)
- Purpose:
- AGP slots were specifically designed for graphics cards to provide a dedicated connection between the GPU and the CPU/RAM, offering better performance than PCI for graphics.
- Versions:
- AGP 1x, 2x, 4x, and 8x, each offering different levels of bandwidth.
- Compatibility:
- AGP slots are not compatible with PCI or PCIe cards. AGP has been phased out in favor of PCIe for graphics cards.
Other Expansion Slots
- M.2 (formerly NGFF – Next Generation Form Factor):
- Purpose: M.2 slots are used primarily for SSDs, but they can also support Wi-Fi and Bluetooth cards.
- Interface: M.2 supports both PCIe and SATA interfaces, with PCIe offering significantly higher speeds.
- Form Factors: M.2 devices come in different sizes, indicated by a four or five-digit number (e.g., 2280, where 22 is the width in mm and 80 is the length in mm).
- CNR (Communications and Networking Riser):
- Purpose: Used in older systems for low-cost network cards, modems, and audio devices.
- Compatibility: CNR slots are largely obsolete and not found on modern motherboards.
- AMR (Audio/Modem Riser):
- Purpose: Used for audio and modem expansion cards in older systems.
- Compatibility: Like CNR, AMR slots are obsolete.
Summary of Expansion Slots
| Slot Type | Common Use | Speed/Bandwidth | Status |
| PCIe | Graphics cards, SSDs, network cards | Up to 64 GB/s (PCIe 5.0 x16) | Current and widely used |
| PCI | Network cards, sound cards, modems | Up to 533 MB/s (32-bit, 33 MHz) | Obsolete |
| AGP | Graphics cards | Up to 2.1 GB/s (AGP 8x) | Obsolete |
| M.2 | SSDs, Wi-Fi cards | Up to 8 GB/s (PCIe 3.0 x4) | Current and widely used |
| CNR | Network and audio cards | Low bandwidth | Obsolete |
| AMR | Audio and modem cards | Low bandwidth | Obsolete |
In modern motherboards, PCIe and M.2 are the primary expansion slots used due to their high speed and versatility. PCI and AGP slots are found in older systems and have been largely replaced by the more advanced PCIe standard.
9. How do I install a graphics card on a motherboard?
Installing a graphics card on a motherboard is a straightforward process, but it requires careful handling to avoid damaging any components. Here’s a step-by-step guide to help you install a graphics card correctly:
1. Prepare Your Workspace
- Static-Free Environment: Work on a clean, static-free surface. Use an anti-static wrist strap to prevent static discharge.
- Power Off and Unplug: Turn off your computer and unplug it from the power source.
- Open the Case: Remove the side panel of your computer case to access the motherboard.
2. Locate the PCIe Slot
- Identify the Slot: Find the PCIe x16 slot on your motherboard. This is the slot where the graphics card will be installed. It is usually the longest PCIe slot and is often labeled on the motherboard.
3. Prepare the Slot and Case
- Remove Expansion Slot Covers: Depending on your case, you might need to remove one or more expansion slot covers on the back of the case to make space for the graphics card’s output ports.
- Check Clearance: Ensure there is enough clearance for the graphics card, including any adjacent components that might interfere with installation.
4. Install the Graphics Card
- Hold the Card Properly:
- Hold the graphics card by its edges, avoiding contact with the gold connectors and circuitry.
- Align the Card:
- Align the gold PCIe connector on the graphics card with the PCIe slot on the motherboard.
- Insert the Card:
- Firmly but gently push the graphics card into the PCIe slot until it is fully seated. You may hear a click when the card locks into place. Ensure the card is straight and fully inserted into the slot.
- Secure the Card:
- Use screws to secure the graphics card to the case. This helps keep the card stable and prevents it from moving.
5. Connect Power Cables (if necessary)
- Check for Power Connectors: Modern graphics cards often require additional power from the power supply unit (PSU). Look for 6-pin, 8-pin, or combinations of these connectors on the top or side of the graphics card.
- Connect Power Cables: Connect the appropriate power cables from the PSU to the graphics card. Ensure the connectors are firmly seated.
6. Close the Case
- Replace the Side Panel: Once the graphics card is securely installed and connected, replace the side panel of your case.
- Reconnect Power: Plug your computer back into the power source.
7. Install Drivers and Software
- Boot the Computer: Turn on your computer. If the graphics card is installed correctly, your monitor should display the startup process.
- Install Drivers:
- Download the latest drivers for your graphics card from the manufacturer’s website (NVIDIA or AMD).
- Install the drivers and restart your computer if prompted.
- Configure Settings: After installing the drivers, you can configure your graphics settings through the graphics card control panel (NVIDIA Control Panel or AMD Radeon Settings).
Summary
- Prepare Your Workspace:
- Static-free environment, power off and unplug, open the case.
- Locate the PCIe Slot:
- Identify the PCIe x16 slot on the motherboard.
- Prepare the Slot and Case:
- Remove expansion slot covers, check clearance.
- Install the Graphics Card:
- Hold the card properly, align, insert, and secure it.
- Connect Power Cables (if necessary):
- Connect the required power cables from the PSU to the graphics card.
- Close the Case:
- Replace the side panel and reconnect power.
- Install Drivers and Software:
- Boot the computer, install drivers, and configure settings.
By following these steps carefully, you can successfully install a graphics card on your motherboard and ensure it operates correctly.
10. What are the different types of storage connectors on a motherboard (SATA, M.2, PCIe)?
Motherboards have various storage connectors to support different types of storage devices. Here are the main types of storage connectors commonly found on motherboards:
SATA (Serial ATA)
- SATA (Serial ATA):
- Purpose: Used for connecting hard drives (HDDs), solid-state drives (SSDs), and optical drives (CD/DVD/Blu-ray).
- Versions: SATA I (1.5 Gbps), SATA II (3 Gbps), SATA III (6 Gbps).
- Connector Types:
- SATA Data Connector: A 7-pin connector used for data transfer.
- SATA Power Connector: A 15-pin connector used for power delivery.
- Compatibility: SATA III is backward compatible with SATA I and II devices, but they will operate at the lower speeds of the older standards.
M.2 (formerly NGFF – Next Generation Form Factor)
- M.2 (M Key, B Key, and B+M Key):
- Purpose: M.2 slots can be used for SSDs, Wi-Fi cards, and other add-in cards.
- Interfaces Supported:
- SATA: M.2 SATA SSDs connect to the SATA bus and have similar performance to traditional 2.5″ SATA SSDs.
- PCIe: M.2 PCIe NVMe SSDs use the PCIe bus, offering significantly higher speeds than SATA SSDs.
- Keying: M.2 connectors have different key types (notches) to prevent incorrect installation.
- M Key: Typically used for PCIe x4 NVMe SSDs.
- B Key: Typically used for SATA or PCIe x2 devices.
- B+M Key: Compatible with both SATA and PCIe x2 interfaces.
- Form Factors: M.2 devices come in various sizes, indicated by a four or five-digit number (e.g., 2280, where 22 is the width in mm and 80 is the length in mm).
PCIe (Peripheral Component Interconnect Express)
- PCIe (Peripheral Component Interconnect Express):
- Purpose: Used for high-speed SSDs (NVMe), graphics cards, network cards, and other high-performance peripherals.
- Versions: PCIe 1.0, 2.0, 3.0, 4.0, 5.0, with each version offering higher bandwidth.
- Slots and Lanes: PCIe slots come in different configurations (x1, x4, x8, x16) depending on the number of lanes they support, which affects data transfer rates.
- PCIe Storage Devices: NVMe SSDs that use PCIe offer faster speeds compared to SATA SSDs. They can connect via M.2 slots or directly to a PCIe slot using an adapter.
Other Storage Connectors
- U.2:
- Purpose: Used for connecting high-performance SSDs in enterprise environments.
- Interface: Supports PCIe and NVMe protocols, similar to M.2, but uses a different physical connector.
- Use Case: Commonly found in servers and workstations where hot-swappable and high-capacity storage is required.
- SAS (Serial Attached SCSI):
- Purpose: Used for enterprise-level storage devices, such as high-speed hard drives and SSDs.
- Interface: Compatible with SATA drives, allowing for a mix of SAS and SATA drives in the same system.
- Use Case: Predominantly used in servers and data centers due to its reliability and speed.
Summary of Storage Connectors
| Connector Type | Purpose | Interface Type | Typical Use Case |
| SATA | HDDs, SSDs, Optical Drives | SATA I, II, III | General consumer storage |
| M.2 | SSDs, Wi-Fi cards | SATA, PCIe (NVMe) | High-performance consumer and enterprise SSDs |
| PCIe | NVMe SSDs, Graphics Cards, Network Cards | PCIe 1.0, 2.0, 3.0, 4.0, 5.0 | High-performance peripherals |
| U.2 | Enterprise SSDs | PCIe, NVMe | Servers and workstations |
| SAS | Enterprise HDDs and SSDs | SAS, SATA | Servers and data centers |
When choosing storage connectors and devices, consider the performance requirements, compatibility with the motherboard, and the specific use case (e.g., general consumer use, gaming, professional workstations, or enterprise environments).
11. How do I troubleshoot common motherboard issues (no power, no display, etc.)?
Troubleshooting common motherboard issues can be complex, as these problems can stem from various components and configurations. Here’s a step-by-step guide to help you identify and fix issues like no power, no display, and other common motherboard-related problems:
1. No Power
Check the Power Supply
- Ensure Power Connections:
- Verify that the power supply unit (PSU) is switched on.
- Check if the power cable is securely plugged into both the PSU and the wall outlet.
- Ensure the 24-pin main power connector and 8-pin (or 4-pin) CPU power connector are securely connected to the motherboard.
- Test the PSU:
- Use a PSU tester or the paperclip method to check if the PSU is functioning. For the paperclip test, connect the green wire to any black wire on the 24-pin connector. If the PSU fan turns on, it’s likely functioning.
Inspect the Power Button and Cables
- Check Front Panel Connectors:
- Ensure the front panel power button connector is properly connected to the motherboard.
- Inspect the power button itself by shorting the power switch pins on the motherboard with a screwdriver to see if the system powers on.
Inspect the Motherboard and Components
- Look for Visible Damage:
- Check for any burnt components, bulging capacitors, or physical damage on the motherboard.
- Test with Minimal Configuration:
- Disconnect all non-essential components (e.g., HDD, SSD, GPU) and try to power on with just the CPU, one stick of RAM, and the PSU connected.
2. No Display
Check the Monitor and Cables
- Verify Monitor Functionality:
- Ensure the monitor is powered on and set to the correct input source.
- Test the monitor with another device to confirm it’s working.
- Inspect Cables:
- Check if the display cables (HDMI, DisplayPort, DVI, VGA) are securely connected to both the monitor and the graphics card or motherboard.
Inspect the Graphics Card
- Reseat the GPU:
- Power off the system, remove the graphics card, and then reseat it firmly in the PCIe slot.
- Test Integrated Graphics:
- If your CPU has integrated graphics, remove the graphics card and connect the monitor to the motherboard’s video output.
Inspect the RAM
- Reseat or Replace RAM:
- Reseat the RAM modules. If the problem persists, try using one stick of RAM at a time in different slots to identify faulty RAM.
Inspect the CPU and Cooler
- Check for Proper Installation:
- Ensure the CPU is properly seated in its socket and the cooler is securely attached.
- Look for POST Codes or Beeps:
- Check the motherboard manual for POST codes or beep sequences that indicate specific errors.
3. System Randomly Freezes or Reboots
Check for Overheating
- Monitor Temperatures:
- Use software tools like HWMonitor or Core Temp to check CPU and GPU temperatures.
- Ensure all fans are working properly and the case has adequate airflow.
Check for Faulty Components
- Test RAM:
- Use tools like MemTest86 to check for RAM errors.
- Inspect PSU:
- Ensure the PSU is supplying stable power. If possible, test with a different PSU.
4. No Sound
Check Audio Settings
- Inspect Connections:
- Ensure speakers or headphones are plugged into the correct audio jack.
- Check Software Settings:
- Verify that the correct playback device is selected in the sound settings of the operating system.
Inspect Audio Drivers
- Update Drivers:
- Update or reinstall audio drivers from the motherboard manufacturer’s website.
5. No Network Connectivity
Check Network Cables and Devices
- Inspect Physical Connections:
- Ensure the Ethernet cable is securely connected to the motherboard and router/modem.
- Test Network Device:
- Test the Ethernet cable and router/modem with another device to ensure they are functioning.
Inspect Network Drivers
- Update Drivers:
- Update or reinstall network drivers from the motherboard manufacturer’s website.
General Troubleshooting Steps
- Clear CMOS:
- Reset BIOS/UEFI settings to default by clearing the CMOS. This can be done by removing the CMOS battery for a few minutes or using a jumper, as described in the motherboard manual.
- Check for BIOS/UEFI Updates:
- Update the BIOS/UEFI to the latest version to ensure compatibility and fix bugs.
- Check Documentation and Online Resources:
- Consult the motherboard manual for troubleshooting tips and check online forums and the manufacturer’s support site for known issues and solutions.
By following these steps, you can systematically troubleshoot and resolve common motherboard issues, ensuring your system runs smoothly.
12. Can I upgrade my motherboard’s components (RAM, CPU, etc.)?
yes, you can upgrade various components of your motherboard, such as the RAM, CPU, storage devices, and more. However, compatibility and limitations must be considered for each type of upgrade. Here’s a detailed guide on how to upgrade your motherboard’s components:
1. Upgrading RAM
Check Compatibility
- Motherboard Specifications: Check your motherboard manual or manufacturer’s website for supported RAM types (DDR3, DDR4, DDR5), speeds, and maximum capacity.
- Current Configuration: Identify the current RAM configuration (number of sticks, speed, capacity).
Upgrade Steps
- Power Off and Unplug: Turn off your computer and unplug it from the power source.
- Open the Case: Remove the side panel of your case.
- Remove Old RAM (if necessary):
- Push down the retaining clips on either side of the RAM slot to release the module.
- Gently pull out the RAM stick.
- Install New RAM:
- Align the notch on the RAM stick with the notch in the RAM slot.
- Firmly press the RAM stick into the slot until the retaining clips click into place.
- Close the Case: Replace the side panel and reconnect the power.
2. Upgrading the CPU
Check Compatibility
- Socket Type: Ensure the new CPU is compatible with your motherboard’s socket (e.g., LGA 1200, AM4).
- Chipset Support: Verify that the motherboard chipset supports the new CPU.
- BIOS/UEFI Update: Check if a BIOS/UEFI update is required for the new CPU to work.
Upgrade Steps
- Power Off and Unplug: Turn off your computer and unplug it from the power source.
- Open the Case: Remove the side panel of your case.
- Remove the CPU Cooler:
- Disconnect the cooler’s fan cable.
- Unscrew or unclip the cooler and gently remove it from the CPU.
- Remove the Old CPU:
- Lift the CPU socket lever to release the CPU.
- Carefully remove the old CPU, holding it by the edges.
- Install the New CPU:
- Align the notches or triangles on the new CPU with the socket.
- Gently place the CPU into the socket and lower the lever to secure it.
- Apply Thermal Paste: Apply a small amount of thermal paste to the center of the CPU if the cooler doesn’t have pre-applied paste.
- Reinstall the CPU Cooler:
- Place the cooler on the CPU and secure it.
- Connect the cooler’s fan cable to the CPU fan header.
- Close the Case: Replace the side panel and reconnect the power.
3. Upgrading Storage Devices (HDD/SSD)
Check Compatibility
- Interface Type: Ensure your motherboard has the appropriate connectors for the new storage device (e.g., SATA, M.2).
- Form Factor: Verify the physical size and form factor (e.g., 2.5-inch SSD, M.2 2280).
Upgrade Steps
- Power Off and Unplug: Turn off your computer and unplug it from the power source.
- Open the Case: Remove the side panel of your case.
- Install the New Storage Device:
- For SATA devices: Mount the device in an appropriate drive bay and connect the SATA and power cables.
- For M.2 devices: Insert the M.2 SSD into the M.2 slot at an angle, then secure it with a screw.
- Close the Case: Replace the side panel and reconnect the power.
- Initialize and Format: Boot into the operating system, then initialize and format the new drive using Disk Management (Windows) or Disk Utility (macOS).
4. Upgrading the GPU
Check Compatibility
- PCIe Slot: Ensure your motherboard has a compatible PCIe slot (usually PCIe x16).
- Power Supply: Verify that your power supply can support the new GPU’s power requirements and has the necessary power connectors.
Upgrade Steps
- Power Off and Unplug: Turn off your computer and unplug it from the power source.
- Open the Case: Remove the side panel of your case.
- Remove the Old GPU (if applicable):
- Unscrew the GPU from the case and disconnect any power cables.
- Release the PCIe slot latch and gently remove the old GPU.
- Install the New GPU:
- Align the GPU with the PCIe slot and firmly press it into place until the latch clicks.
- Secure the GPU to the case with screws.
- Connect the necessary power cables from the PSU to the GPU.
- Close the Case: Replace the side panel and reconnect the power.
- Install Drivers: Boot into the operating system and install the latest drivers for the new GPU.
Summary
- RAM Upgrade: Check compatibility, power off, open the case, install new RAM, close the case, and power on.
- CPU Upgrade: Check compatibility, update BIOS if necessary, power off, open the case, replace CPU and cooler, apply thermal paste, close the case, and power on.
- Storage Device Upgrade: Check compatibility, power off, open the case, install the new device, close the case, and initialize/format the drive.
- GPU Upgrade: Check compatibility, power off, open the case, replace the GPU, connect power cables, close the case, and install drivers.
By following these steps, you can successfully upgrade various components on your motherboard, improving your computer’s performance and capabilities.
13. How do I choose the right motherboard for gaming or video editing?
Choosing the right motherboard for gaming or video editing involves several important considerations to ensure compatibility, performance, and future-proofing. Here’s a guide to help you make an informed decision:
1. Determine Your CPU Choice
- Compatibility: The motherboard must support the specific CPU you plan to use. Ensure the socket type (e.g., Intel LGA 1700, AMD AM4/AM5) and chipset (e.g., Intel Z790, AMD X570) are compatible with your chosen CPU.
- Performance Needs: High-end CPUs are beneficial for gaming and video editing, so choose a motherboard that supports the latest and most powerful CPUs.
2. Choose the Right Form Factor
- ATX: Standard size, offering the most expansion slots and features. Suitable for most gaming and video editing builds.
- Micro-ATX: Smaller than ATX with fewer expansion slots but still sufficient for many users.
- Mini-ITX: Compact size, limited slots, suitable for small form factor builds but can be restrictive in terms of upgrades and cooling.
3. Consider RAM Support
- Capacity: For gaming, 16GB to 32GB of RAM is typically sufficient. For video editing, 32GB or more is recommended.
- Speed: Higher RAM speeds (e.g., 3200MHz or higher) can improve performance. Ensure the motherboard supports the desired RAM speed.
- Expansion: Check the number of RAM slots and the maximum supported capacity to ensure future upgrades.
4. Look at Expansion Slots
- PCIe Slots: Ensure there are enough PCIe x16 slots for your GPU(s) and any other expansion cards (e.g., additional SSDs, capture cards).
- Multi-GPU Support: If you plan to use multiple GPUs for gaming or rendering, ensure the motherboard supports SLI (NVIDIA) or CrossFire (AMD).
5. Storage Options
- SATA Ports: Ensure there are enough SATA ports for your HDDs and SATA SSDs.
- M.2 Slots: Look for multiple M.2 slots for high-speed NVMe SSDs, which are crucial for faster load times and better performance in video editing.
- RAID Support: If you need RAID configurations for data redundancy or performance, ensure the motherboard supports it.
6. Connectivity and Ports
- USB Ports: Ensure there are enough USB ports (including USB 3.1/3.2 and USB-C) for your peripherals and external storage.
- Thunderbolt Support: Useful for fast data transfer, particularly in video editing.
- Networking: Look for motherboards with built-in Wi-Fi 6 or higher and/or 2.5Gb or faster Ethernet for better network performance.
7. Audio and Video Outputs
- Audio Quality: High-quality onboard audio is beneficial for both gaming and video editing. Look for motherboards with advanced audio codecs and features.
- Video Outputs: If you plan to use integrated graphics, ensure the motherboard has the necessary video outputs (HDMI, DisplayPort).
8. Power Delivery and Cooling
- VRM Quality: A robust VRM (voltage regulator module) design ensures stable power delivery, essential for high-performance CPUs and overclocking.
- Cooling Solutions: Look for motherboards with good heat sinks and fan headers to manage thermal performance, especially important in video editing rigs that handle heavy loads.
9. BIOS/UEFI Features
- Ease of Use: A user-friendly BIOS/UEFI interface can make system tuning and troubleshooting easier.
- Overclocking Support: For enthusiasts who want to overclock their CPU or RAM, ensure the motherboard provides robust overclocking options.
10. Brand and Warranty
- Reputable Brands: Choose motherboards from well-known and reliable brands like ASUS, MSI, Gigabyte, ASRock, or others with good customer support.
- Warranty: Check the warranty period and terms to ensure coverage in case of defects or issues.
Recommended Motherboards for Gaming and Video Editing
For Gaming
- ASUS ROG Strix Z790-E Gaming WiFi: High-end features, excellent power delivery, multiple M.2 slots, Wi-Fi 6E.
- MSI MPG B550 Gaming Edge WiFi: Mid-range option, good VRM, multiple PCIe slots, Wi-Fi 6.
For Video Editing
- Gigabyte Z790 AORUS Master: Excellent connectivity, robust VRM, multiple M.2 slots, Thunderbolt 4.
- ASUS ProArt X570-Creator WiFi: Tailored for content creators, Thunderbolt 4, multiple M.2 slots, Wi-Fi 6E.
Summary
- CPU Compatibility: Ensure the motherboard supports your chosen CPU.
- Form Factor: Choose based on your case size and expansion needs.
- RAM Support: Check for capacity, speed, and future upgrade options.
- Expansion Slots: Ensure adequate PCIe slots for GPUs and other cards.
- Storage Options: Look for sufficient SATA ports and M.2 slots.
- Connectivity: Ensure ample USB ports, network capabilities, and video outputs.
- Audio/Video Quality: High-quality onboard audio and necessary video outputs.
- Power/Cooling: Robust VRM and good cooling solutions.
- BIOS Features: User-friendly interface and overclocking support.
- Brand/Warranty: Choose reputable brands with good support and warranty.
By considering these factors, you can select a motherboard that meets your needs for gaming or video editing, ensuring both performance and future upgrade potential.
14. What are the benefits of a high-quality motherboard versus a budget-friendly one?
Choosing between a high-quality motherboard and a budget-friendly one involves weighing various benefits and trade-offs. Here’s an overview of the advantages offered by high-quality motherboards compared to budget-friendly ones:
High-Quality Motherboards
1. Better Power Delivery and Stability
- Enhanced VRM (Voltage Regulator Module) Design: High-quality motherboards usually have better VRM designs, which ensure stable and efficient power delivery to the CPU, especially important for overclocking.
- Durable Components: Use of high-grade capacitors, chokes, and other components that improve longevity and reliability.
2. Improved Overclocking Capabilities
- Advanced BIOS/UEFI Features: More options for tweaking and fine-tuning system performance, including detailed control over CPU and RAM settings.
- Robust Cooling Solutions: Enhanced cooling for VRMs and chipset, often with larger heatsinks and better thermal pads, which help maintain stability during overclocking.
3. More Expansion Slots and Connectivity Options
- Multiple PCIe Slots: Allows for multi-GPU setups and additional expansion cards (e.g., sound cards, network cards).
- More M.2 and SATA Ports: Greater storage expansion options, with support for multiple high-speed NVMe SSDs.
4. Enhanced Audio and Networking
- Superior Audio Solutions: Higher-quality audio components and better onboard sound chips (e.g., higher SNR, built-in amplifiers).
- Advanced Networking: Inclusion of faster Ethernet (e.g., 2.5Gb or 10Gb) and Wi-Fi 6/6E for improved network performance and reliability.
5. Better Build Quality and Aesthetics
- Reinforced PCIe Slots: Metal shielding on PCIe slots to support heavy GPUs.
- Aesthetic Features: Customizable RGB lighting, better layout and design for easier cable management and a cleaner build.
6. Comprehensive Software and Firmware Support
- BIOS Updates and Utilities: Frequent BIOS updates and access to manufacturer utilities for system monitoring and control.
- Enhanced Warranty and Support: Often come with longer warranties and better customer support services.
Budget-Friendly Motherboards
1. Cost-Effective
- Lower Initial Cost: Significantly cheaper, making them ideal for budget builds or for users who do not need advanced features.
- Sufficient for Basic Tasks: Adequate for everyday computing needs, including web browsing, office work, and light gaming.
2. Basic Features and Functionality
- Standard Connectivity: Provides essential ports and slots, though with fewer options compared to high-end models.
- Simplicity: Easier to set up and configure due to fewer advanced settings and features.
3. Reasonable Performance
- Decent Performance for Price: Can handle most mainstream CPUs and basic overclocking, suitable for users who do not require extreme performance.
- Adequate Expansion: Usually has enough expansion slots and ports for a single GPU and a few storage devices.
Summary of Benefits
| Feature | High-Quality Motherboards | Budget-Friendly Motherboards |
|---|---|---|
| Power Delivery | Superior VRM and components for stability and overclocking | Basic VRM, suitable for stock performance |
| Overclocking | Advanced BIOS/UEFI features, robust cooling | Limited overclocking capabilities |
| Expansion and Connectivity | Multiple PCIe, M.2, and SATA ports | Fewer expansion options |
| Audio and Networking | High-quality audio and advanced networking (Wi-Fi 6, 2.5Gb+ LAN) | Basic audio and networking |
| Build Quality and Aesthetics | Reinforced slots, customizable RGB, better layout | Simple design, basic build quality |
| Software and Support | Frequent updates, comprehensive utilities, better warranty | Limited software features, basic warranty |
| Cost | Higher cost for advanced features and performance | Lower cost, suitable for budget builds |
Conclusion
High-Quality Motherboards are ideal for enthusiasts, gamers, and professionals who need robust performance, advanced features, and future-proofing. They offer better power delivery, superior overclocking capabilities, more connectivity options, and enhanced audio and networking.
Budget-Friendly Motherboards are suitable for users on a tight budget or those who do not require advanced features. They provide sufficient performance for everyday tasks and basic gaming, with the advantage of a lower initial cost.
When choosing a motherboard, consider your specific needs, budget, and the importance of features like overclocking, expansion capabilities, and long-term reliability.
15. How do I properly clean and maintain my motherboard?
Proper cleaning and maintenance of your motherboard are crucial for ensuring its longevity and optimal performance. Dust and debris can affect cooling, cause overheating, and potentially lead to hardware failures. Here’s a guide to help you clean and maintain your motherboard effectively:
1. Safety First
- Power Off and Unplug: Always power down your computer and unplug it from the wall socket before working inside the case.
- Ground Yourself: Use an anti-static wrist strap or regularly touch a grounded metal object to prevent static electricity from damaging sensitive components.
2. Cleaning the Motherboard
Tools and Materials Needed
- Soft Brush: A small, soft-bristled brush or a clean, dry paintbrush to remove dust.
- Compressed Air: A can of compressed air to blow away dust from hard-to-reach areas.
- Microfiber Cloth: For wiping surfaces gently.
- Isopropyl Alcohol (optional): 70% or higher concentration for cleaning stubborn residues, applied with a lint-free cloth or cotton swab.
Cleaning Steps
- Remove Components:
- Disconnect Cables: Unplug all cables connected to the motherboard.
- Remove Expansion Cards: Gently remove any PCIe or PCI cards, including the graphics card.
- Take Out RAM Modules: Release the clips and carefully remove RAM sticks.
- Detach Storage Devices: Disconnect and remove any drives connected to the motherboard.
- Dusting Off:
- Use Compressed Air: Hold the can upright and use short bursts to blow dust off the motherboard and components. Avoid holding the can too close to prevent moisture from getting on the board.
- Brush Off Dust: Gently brush away any remaining dust with a soft brush, especially around connectors and components.
- Wipe Down (If Necessary):
- Dry Wipe: Use a dry microfiber cloth to wipe any surfaces that are dusty.
- Alcohol Cleaning: For stubborn stains or residues, dampen a lint-free cloth or cotton swab with isopropyl alcohol and gently clean affected areas. Avoid excessive moisture and ensure the board is completely dry before reassembly.
- Reassemble:
- Reinstall RAM and Expansion Cards: Insert RAM sticks and expansion cards back into their slots. Ensure they are firmly seated.
- Reconnect Cables: Plug in all cables, including power, data, and peripheral connections.
3. Regular Maintenance Tips
- Keep the Case Clean: Regularly clean the inside of your computer case to minimize dust buildup. Use filters on intake fans to reduce dust entry.
- Monitor Temperatures: Use software to monitor CPU and GPU temperatures. Overheating can be a sign of poor airflow or excessive dust.
- Check Fan Functionality: Ensure all fans (case, CPU, GPU) are working correctly. Dust and debris can impede fan performance.
- Inspect Periodically: Perform visual inspections of the motherboard and other components every few months to catch any potential issues early.
4. Preventive Measures
- Use Air Filters: Install dust filters on your case’s intake vents to reduce dust entering the system.
- Maintain Good Airflow: Ensure your case has adequate airflow with properly arranged intake and exhaust fans.
- Keep the Environment Clean: Maintain a clean workspace and environment to reduce dust accumulation inside the computer case.
Summary
- Safety First: Power off, unplug, and ground yourself.
- Clean Regularly: Use compressed air and a soft brush to remove dust.
- Wipe Carefully: Use a microfiber cloth and isopropyl alcohol for stubborn residues.
- Reassemble and Maintain: Reinstall components, and regularly check for dust buildup and proper cooling.
By following these cleaning and maintenance practices, you can help ensure your motherboard remains in good condition and your computer runs smoothly.


Không phải ngẫu nhiên mà xn88 có uy tín không có hàng triệu thành viên. Uy tín được xây dựng từ năm 2019 giúp thương hiệu này đứng vững trước mọi đối thủ cạnh tranh. TONY01-06S
Heard pk777game has some cool new features. Thinking about downloading it and giving it a playthrough. Let’s see if it lives up to the hype. Game on: pk777game
Wah, NH88hlink lagi! Okay juga, banyak game baru. Semoga kali ini gacor lah. nh88hlink
Thank you for your sharing. I am worried that I lack creative ideas. It is your article that makes me full of hope. Thank you. But, I have a question, can you help me?
Thanks for sharing. I read many of your blog posts, cool, your blog is very good. https://accounts.binance.com/fr/register-person?ref=T7KCZASX